⏬ Importing from No Man's Sky
The way this tool interacts with No Man’s Sky is through your save file by editing the parts that contain your data for bases and corvettes.
There are many options now for tools that interact with your Save file. Here are a few guides on how to extract your base data with these tools.
Download the latest version of the NMSBaseJsonEditor here: https://www.nexusmods.com/nomanssky/mods/3849
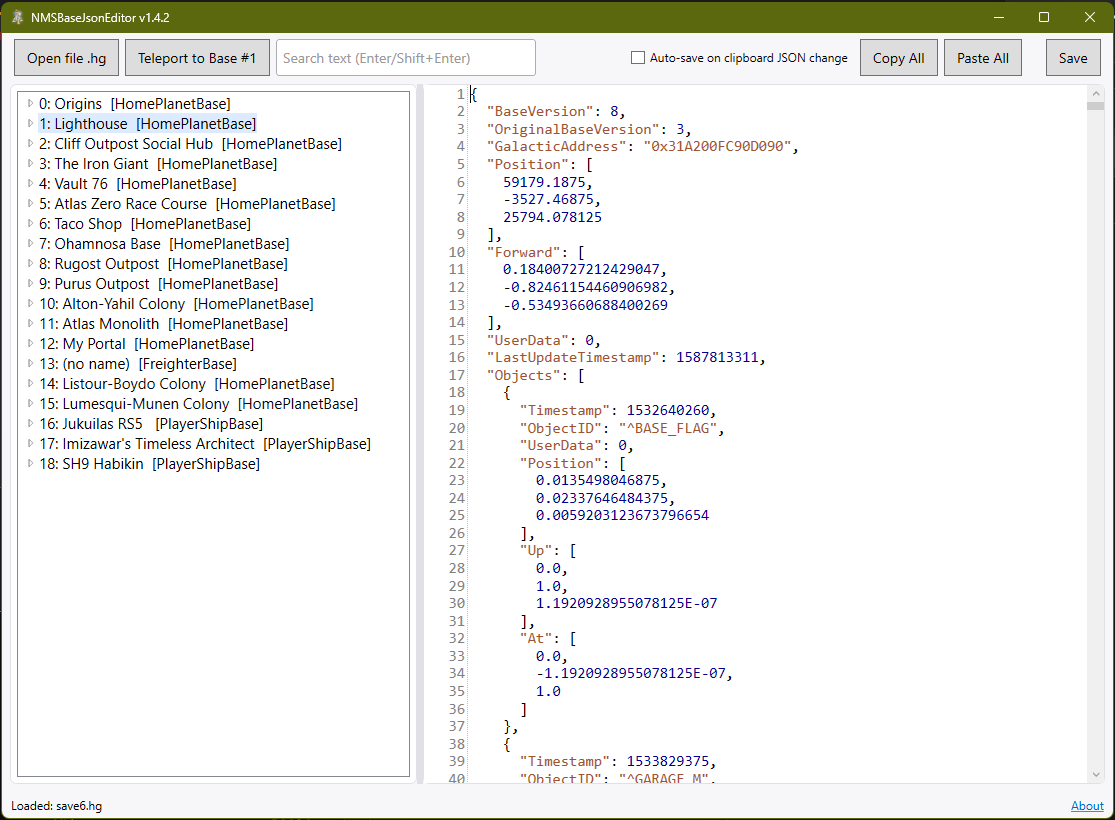
NMSBaseJsonEditor is probably the simplest and fastest way to access, view, and edit base data within your save file to be used with either the Base Building Blender tools or the App.
This is a good option if you are only interested in editing bases or corvettes and not familiar with the more advanced save editors like GoatFungus’ Save Editor or NomNom. However if you use these tools you can view instructions for those using the tabs above.
To use the tool, launch the application and click Open file .hg, then select the No Man’s Sky save file you wish to edit.
Download the latest version of GoatFungus’ Save Editor here: https://github.com/goatfungus/NMSSaveEditor
Open the Save Editor and select the save file that contains the base you want to edit.
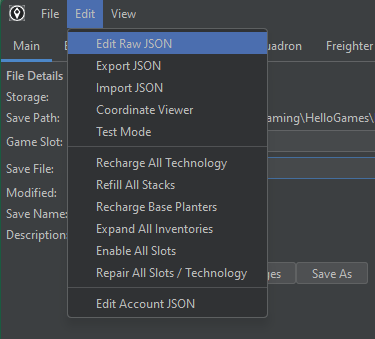
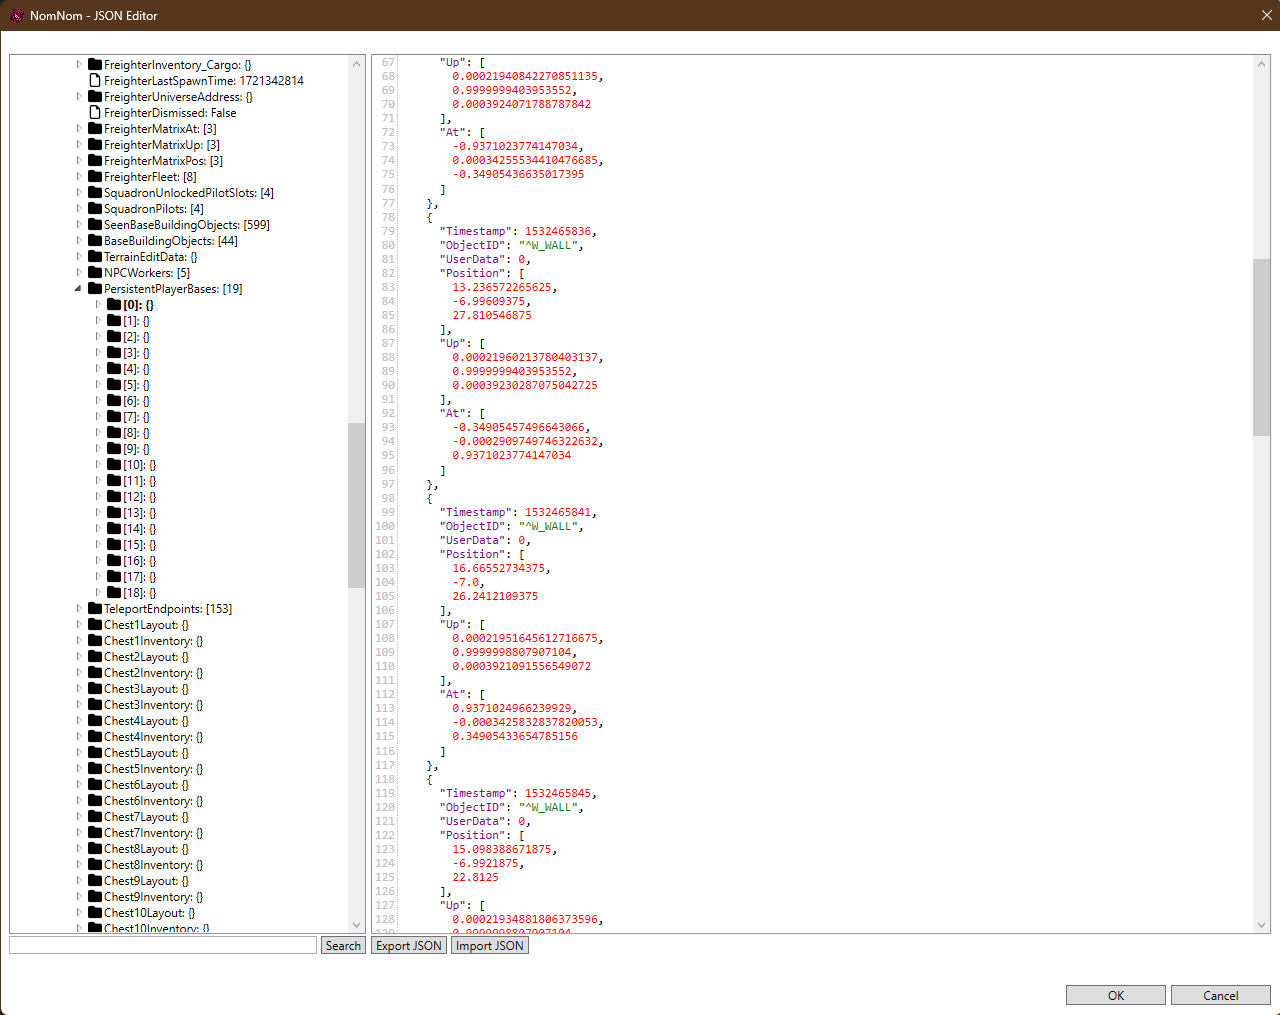
With the save selected and loaded, go to the Edit > Edit Raw JSON menu option.
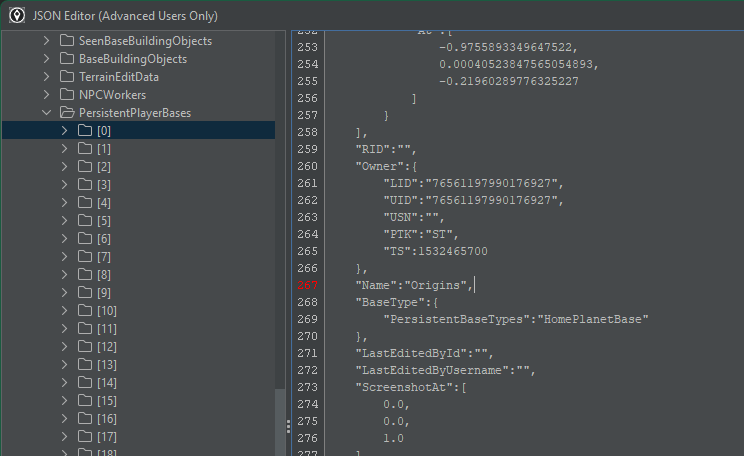
In the new window you’ll see a folder tree view on the left and a blank panel on the right. From the tree view you want to navigate to the following folder.
BaseContext => PlayerStateData => PersistentPlayerBases
Expand the PersistentPlayerBases folder and you will see a series of numbers starting from 0 and going up. All these numbers refer to the bases that you have made in the game. 0 being the very first base you made. It’s likely your freighter base will be towards the top of this list too, and any corvettes will be here from the Voyagers update.
Selecting one of these numbers will refresh the right panel, and present to you the data for your base (in JSON format). You can identify the base by it’s name, by looking for the “Name” field.
Download the latest version of NomNom’s Save Editor here: https://github.com/zencq/NomNom
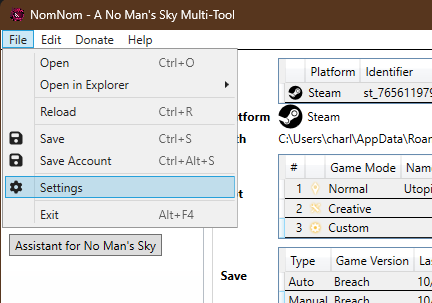
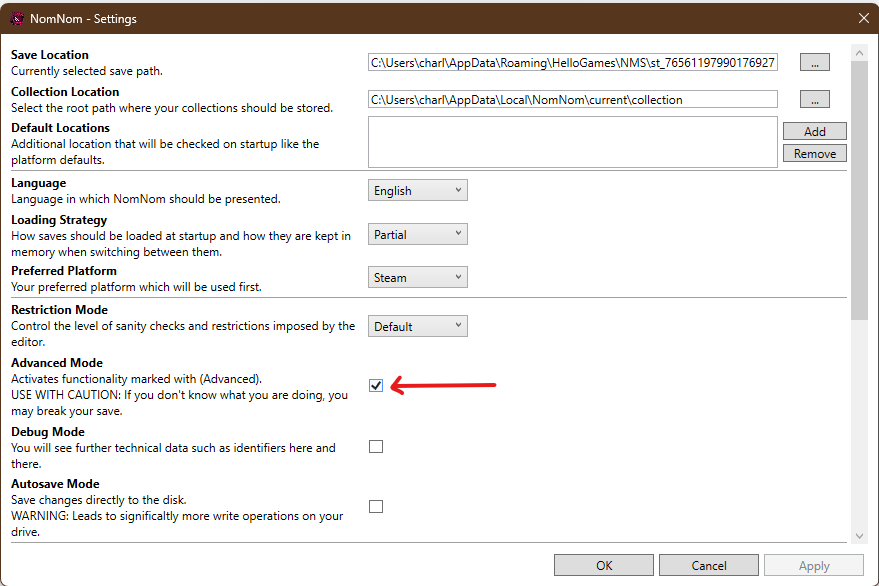
First you need to enable Advanced Mode after opening the save editor. This can be found in the File > Settings menu.
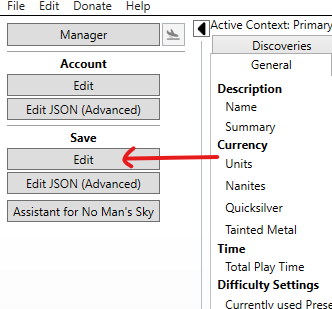
With this enabled - go back to the main window, select a save file, and press the Edit button on the left bar.
The tool will now refresh based on your save file and you will see various tabs at the top. From here select “Base Building”. This area will allow you to easily navigate and select your various bases and see their options.
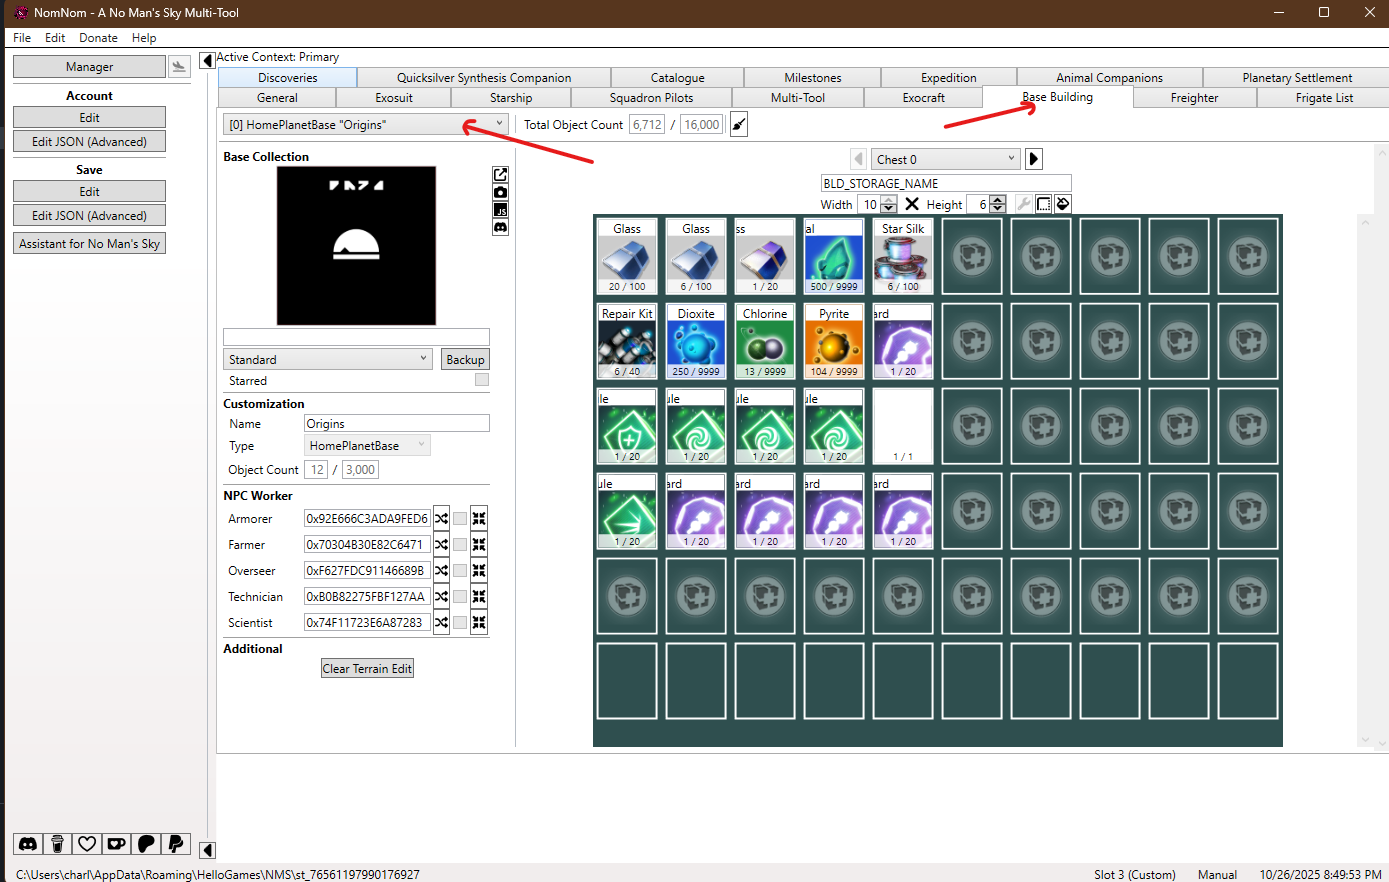
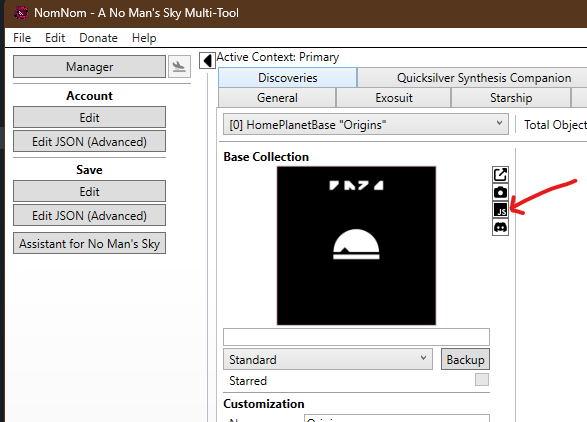
After selecting a base, look out for the small JS icon to the right of it’s thumbnail. This will load up the JSON editor for your Save and automatically position you where the data for the base is.
WARNING: For Corvettes, using the Starship tab will take you to the wrong part of your save file. Corvette building data is located in the SAME location as regular Base data. There is not a convenient way to do this in NomNom, so navigate to
BaseContext => PlayerStateData => PersistentPlayerBasesin the JSON editor and find the Corvette in this list you wish to edit. This location is shown in the screenshots below.
Once you’ve correctly identified your base using any of these tools. You need to select the entire chunk of text that is displayed for that base. You can do this by using the Ctrl+A system hotkey.
Copy this text into your clipboard (Ctrl+C).
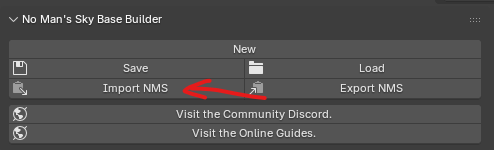
Now it’s time to bring it into Blender. In the side bar for the add-on - select “Import NMS”. This will directly load in the base from your clipboard into the Blender scene.
That’s it! Your base or corvette should now display in Blender.
To make edits and bring this back into the game - check out the Exporting to NMS page for more details.